
Basement Finishing
Basement apartment permit in Toronto: what the drawings have to show
What Toronto asks for in a basement apartment permit: the 45% zoning rule, each drawing sheet and form, and what gets measured in the house first.
Read the guide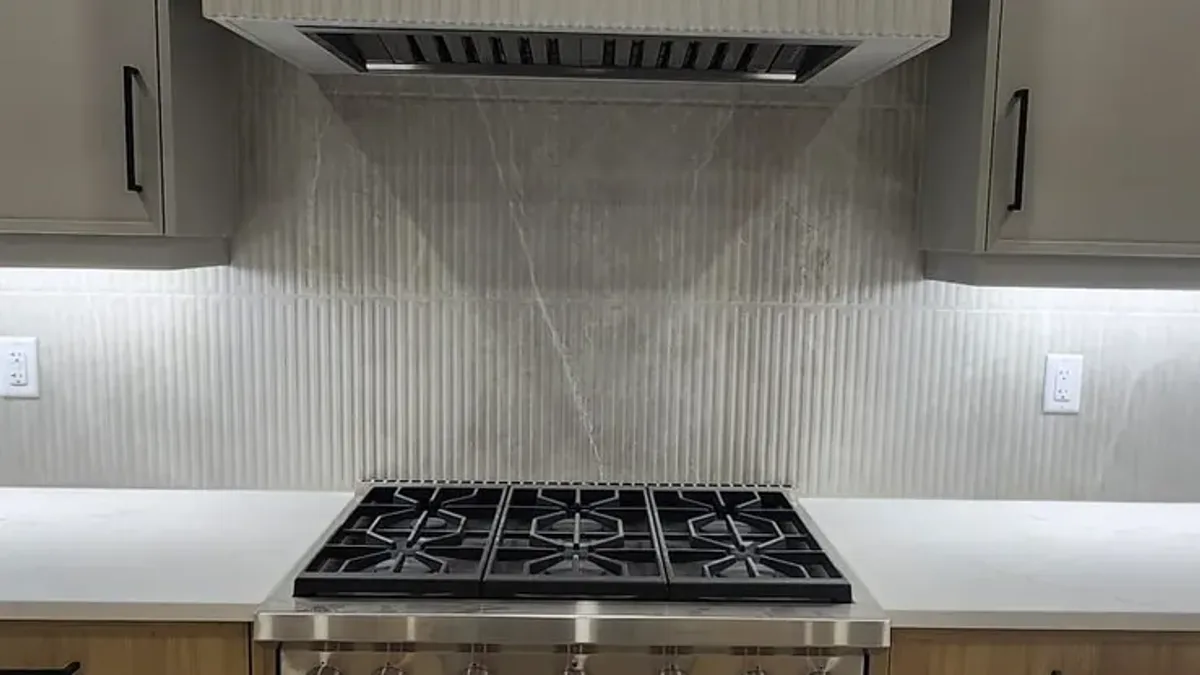
Where to end a kitchen backsplash at the upper cabinets, the hood, an open end, a side wall and a window, and how each tile edge is finished to look planned.
Kitchen Renovations · October 24, 2026 · 7 min read
Where to end a kitchen backsplash gets decided in five places on almost every wall: under the upper cabinets, at the range hood, at the open end of a run, beside a window, and at the corner where the tile meets a side wall. Each of those needs a stopping line, and the line has to be chosen before the tile is ordered, because it decides how much tile, which trim pieces and what has to be on the wall first.
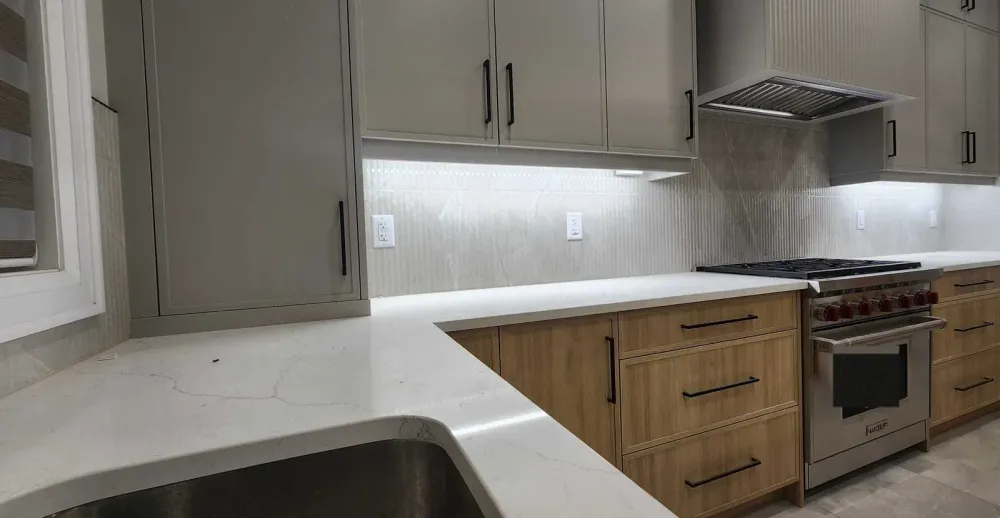
Most advice on this is about looks. On site it is also about what the last tile can stop against. A cut tile edge shows the raw body of the tile, so every place the backsplash ends needs either something to butt into or an edge made for being seen. The photo below is one of our finished kitchens, and the numbers on it are the places this article goes through one by one.
Under upper cabinets, the tile stops at their underside, where the bottom edge of the box or a light rail hides the last course. Behind the range it usually rises to the hood. On a wall with no uppers, pick a line the room already has, such as a shelf, the top of a window or the ceiling.
At point 2 in the photo, the top course sits tight under the cabinets. That is the one place on the wall where a cut tile can go without anyone seeing it, so the layout is usually started from the counter with full tiles and the cut is left for the top. The wire for under-cabinet lights comes out of the wall in that same narrow band, which is why it has to be roughed in before any tile goes up. Our article on lighting layers and switching covers where that feed goes.
Point 3 is the range wall. Between the two upper cabinets the tile carries on up to the hood, so the area to order is larger than the plain strip along the counter, and the top cut can only be made once the hood is hung or its mounting height is fixed on the wall.
| Wall | Where the tile usually stops | What fixes that line |
|---|---|---|
| Uppers along the whole run | Tight to the underside of the cabinets | The cabinets have to be hung first |
| Range between two uppers | Up to the bottom of the hood, or to the ceiling behind a chimney hood | The hood model and its mounting height |
| Open shelves, no uppers | At the lowest shelf, or full height with the shelves fixed through the tile | Shelf heights, with solid blocking in the wall behind each one |
| No uppers, no shelves | One height carried along every wall, or the full wall | A fixed edge such as the top of a window, so the line has a reason |
| Low splash only | A few inches above the counter, the same all round | Nothing but the counter, which is why it suits a wall full of windows |
When the upper and base cabinets end on the same vertical line, the tile ends there too. When they do not, choose one edge and stop square to it, usually the end of the uppers, so the tile reads as a panel under them. A tall cabinet or a fridge enclosure at the end of the run gives the cleanest stop.
Point 1 in the photo is that last case. The tile runs into the side of the tall cabinet, and the joint between them is filled with colour-matched silicone. No trim piece is needed, because nothing of the tile's edge is left in view.
The awkward case is a counter that runs past the last upper cabinet, which happens over a peninsula and wherever the uppers stop short of a wall. Taking the tile to the very end of the counter leaves it sticking out beyond the cabinets above; stopping it at the uppers leaves a short stretch of painted wall over the counter. Both are fine when chosen on purpose. What does not work is a backsplash that ends at neither, floating at a width that matches nothing, which is what happens when the end is decided by where the last full tile landed.
The cleanest ends come from the cabinet layout, not from the tile. Filler strips and small changes to cabinet widths can bring the uppers and bases to the same line at the end of a run, and that is far easier on the drawings than on the wall. So the backsplash ends are best settled while a kitchen renovation is still on paper.
Usually not. A side wall rarely has a counter edge, a cabinet and a ceiling that line up, so the tile ends at the inside corner, where the joint is filled with silicone rather than grout because that corner moves. The exception is a range or a sink pushed right against the side wall, which gets splashed and is worth tiling.
When a side wall is tiled for that reason, the tile needs an edge on two sides, the top and the front, and it looks finished when it goes down to the floor behind the end of the range rather than stopping in mid air above it. Point 5 in the photo is a different situation: the counter itself turns the corner, so the backsplash follows the counter and stops against the window trim.
The tile runs up to the window frame or its casing, never around it at random. Under a window over the sink it goes up to the sill, so a wood apron under the sill comes off before tiling. At the sides, the casing or a return into the window recess gives the tile a fixed edge to stop against.
Two things decide how this looks. First, the height of the backsplash beside the window should be the same as everywhere else, as if the window were not there, so the line under the uppers stays unbroken. Second, the narrow pieces of wall between the window trim and the nearest cabinet are measured at layout. A strip only one finger wide is easier to plan out than to cut, and moving the start of the layout by half a tile often gets rid of it.
In a deep window recess, a solid sill piece of the counter material is common, and the tile then returns into the recess and meets the window frame. That joint is sealed, because water from the sink lands right there.
With a piece made for it: a tile with a factory-finished edge, a bullnose trim from the same series, a metal edge profile set under the last row, or a mitred corner. A cut edge left bare, or covered with a bead of caulk, shows the tile's body and chips over time.
| Edge | How it is done | Settle this when the tile is ordered |
|---|---|---|
| Factory-finished edge | Some glazed tiles have a glazed edge on one or more sides that can be left in view | Which sides are finished, and enough of those tiles for every open end |
| Bullnose or trim piece | A matching trim tile with a rounded edge laid along the end and the top | That the series makes trim, and that it comes from the same batch as the field tile |
| Metal edge profile | An angled strip bedded in the thinset under the last row, its lip flush with the tile face | The profile height for the tile thickness, and a finish that sits well with the faucet and hardware |
| Mitred corner | Both tiles at an outside corner cut to 45 degrees so they meet in a sharp line | A tile whose colour runs through its body, or the cut line will show |
| Into a cabinet or casing | The tile butts a vertical surface and the joint is filled with silicone | The cabinet or casing goes in first and stands out further than the tile face |
Large porcelain panels and thick ribbed tiles, like the one in the photo, often have no trim pieces at all, so a metal profile or a stop against a cabinet is planned for every end where the tile would otherwise be cut in view.
Flush with the tile face, square to the grout lines and at one height along the run, like point 4 in the photo. The boxes are moved or brought forward with extenders before tiling, and the plates are checked against the layout so none of them sits across a joint or on a thin sliver of tile.
Moving a box is electrical work, which in Ontario is done by a Licensed Electrical Contractor who files the notification with the ESA. It is cheaper in time to do it while the old backsplash is off and the wall is open than after the new tile is up. Some kitchens move the counter outlets into a strip mounted under the upper cabinets, which leaves the tile with no plates at all; that choice also has to be made before the wall is closed.
All of the stopping lines above depend on something else being in place or decided first. Before the tile order goes in, each of these should be true:
The counter comes first on that list for a reason. The tile sits on the finished counter surface, and a counter that changes thickness or overhang after the tile is set leaves a gap nobody can hide, which is one more reason to settle the countertop material early.
Art Style Construction builds kitchens across Toronto and the GTA, and the backsplash is one of the last things on the wall, after the cabinets, counters, hood and electrical. Our tile and backsplash installation page describes how the tile itself is set out and finished. To talk about your kitchen, send us a message.
Where there are upper cabinets, up to their underside, and behind the range up to the hood. On a wall without uppers it stops at a line the room already has, such as a shelf, the top of a window or the ceiling, or it stays a low splash a few inches tall.
If the upper and base cabinets end on the same line, at both. If the counter runs past the last upper, most kitchens end the tile square to the uppers; with no uppers at all, the tile ends at the counter edge.
Normally the tile stops at the inside corner. A side wall is worth tiling when a range or sink sits right against it, and then the tile gets a finished top and front edge and usually runs down to the floor.
With a tile that has a factory-finished edge, a bullnose trim from the same series, a metal edge profile, or a mitre at an outside corner. A bare cut edge or a bead of caulk over it is not a finish.
Basement Finishing
What Toronto asks for in a basement apartment permit: the 45% zoning rule, each drawing sheet and form, and what gets measured in the house first.
Read the guide
Bathroom Renovations
How many CFM a bathroom exhaust fan needs, why it moves less air than the box says, where the duct must end, and how to test the fan you have now.
Read the guide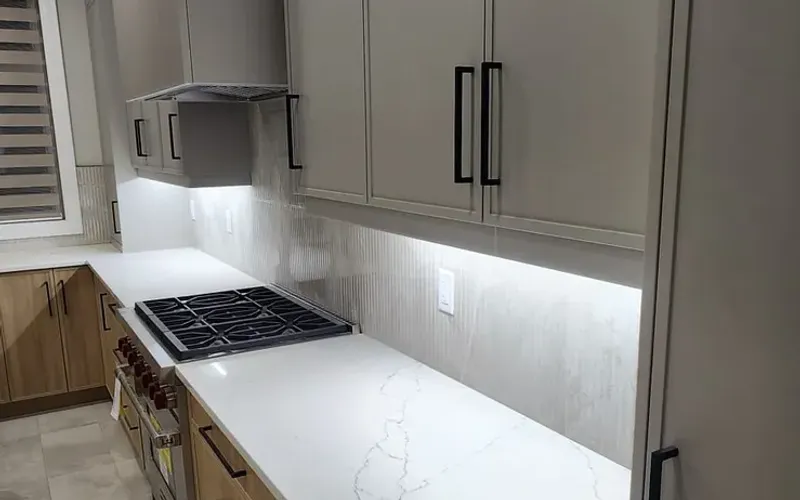
Kitchen Renovations
How to decide whether to paint, reface or replace kitchen cabinets: what to check inside each box, what every finding means, and what moves when boxes come out.
Read the guide
We will walk the space with you, tell you what it actually takes, and put it in writing.